Adding Information Text and Pictures
Video Tutorials
Last Updated
2012:05:24
How to change the text and pictures linked to the menu text
 Displays information at each menu item
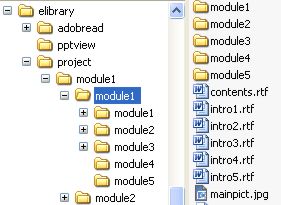
You can display information when the mouse is over each menu item. Simply add files in that directory and give them the following names, where N is the menu number.:-
For text or text + a picture or video add infoN.rtf, menupictN.jpg or gif, videoN.mpg wmv or avi.
Scrolling or sequenced pictures (menupict1.jpg plus menupict1-2.jpg and menupict1-3.jpg etc)
Web pages (add webN.htm instead of infoN.htm)
Adobe PDF (add adobeN.pdf instead of infoN.htm
(See more on subapp windows to change the layout.)
![]()
Description Text Changes
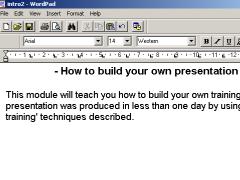
Each item in the contents list can have a separate text file containing a brief description that explains the content of each section.
How to modify:-
Open the intro1.rtf file in any word processor (preferably Word Pad). Simply change the text to whatever you require and re-save the file with the same name. Repeat this for intro2.rtf, intro3.rtf etc.
If intro3.rtf for example, is not included then the blank.rtf file text will be displayed. This allows you to show the same text for several sections.
You can change the text format e.g. colour, font, size from within the word processor and this will be maintained in the finished program.
Rules and Tips:-
The description text must be saved in the same directory as the contents list. Each line in the contents list relates to a separate file of text e.g. intro1.rtf for line one and intro2.rtf for line two etc.
Be careful using special fonts because if those fonts are not installed on the users computer they will only see everything in a basic system font. Stick with something like Arial to be safe.
Descriptive Picture Changes
Each item in the contents list can have a separate picture file that can help to explain the content of that section. This picture will be displayed between the contents list and the description text.
Alternately thumbnail pictures can be used as a combined menu access for all sections. Simply include thumbnail1.jpg etc instead of menupict1.jpg and the thumbnails subapp.
The full screen subapp will also sequence pictures e.g. menupict2-2.jpg and 2-3.jpg etc will follow menupict2.jpg. Just add the pictures with these names.
How to modify:-
Open the menupict5.jpg in any bitmap editing program or simply save your own pictures with the names menupictN.jpg or .gif, where N is the number of the section line in the contents.rtf list.
If no pictures are added for a particular section then the mainpict.jpg located in the root directory will be shown. Alternately a different mainpict.jpg can be added to every sub-directory.
Rules and Tips:-
We recommend that you try to save pictures at the size that they will be displayed. However, if pictures are too large then they will automatically be reduced to the correct size. In many cases this will avoid the need to do any bitmap editing and can save a great deal of time.
Understanding more about the text format used
This text information is simply typed into any word processing package and then saved as a file called e.g. text 1.rtf in the relevant directory.
This format of text is used for the contents list menu contents.rtf, the section description text intro1.rtf and the presentation screen test text1.rtf
We recommend using WordPad rather than MS Word to edit your text file. This is because MS Word contains many powerful text-formatting controls that can create misalignments in text when run on some computers. If preferred you can simply open and save each text file before you produce the final CD.
The contents list must be saved in a Rich Text Format e.g. with the .rtf extension. To do this from any word processor simply save as and select Rich Text Format from the Save as type drop down list box.
You can change the text files even with the eLibrary program running and constantly refresh the screen by switching between menus. This way you can view the effects of your changes virtually as you make them.
The user can press the SCROLL button or arrow keys to see all of the text, if it is too large to show on the screen.
The text style will usually stay the same as your original document. However, we recommend that you use a common text font such as Arial, because if the user does not have the same font that you have used on their computer then the text will default back to their standard system font. You can change the size, or type format and colour, as you desire.
Understanding more about the picture format you can use
Pictures can be saved in either .jpg or .gif format and are generally displayed at the size they have been saved at. However, if the picture size is larger than the space available on the screen it will be rescaled to a suitable size.
Each picture must be placed in the relevant directory and called by the pre-defined names.
mainpict.jpg located in the root directory will be displayed on every menu page unless a menupictN.jpg or .gif picture is provided for that particular section. No .gif format mainpict facility is available.
Adding a mainpict.jpg file into a particular subdirectory will display that picture for all of the menu list items in that subdirectory menu section only.
The menupict1.jpg or .gif picture will be displayed against menu item 1 only. Each subdirectory can have its own menu pictures and if you just add menupict4.jpg then only menu item 4 will have this special picture shown against it.
If no mainpict.jpg or menupict.jpg pictures are added then they will not be displayed. Simply delete the picture files to remove them.
pict1.jpg or .gif etc. will be displayed within the audio visual presentation mode and the number correspond to the step at which the picture will be displayed.
Rules and Tips:-
If .gif files and .jpg files are included with the same name the program will always display the .jpg in preference to the .gif file.
Make sure that your screen is set to a high colour setting or some of the picture quality could be lost. Go to START\ SETTINGS\CONTROL PANEL\DISPLAY\SETTINGS\COLOR PALLET if your picture has rainbow lines instead of smooth colour fades.
In the menu frames the maximum picture size is 320 pixels wide and/or 350 pixels high.
In the audio visual presentation frames the maximum picture size is 680 pixels wide and/or 380 pixels high.
Please remember that this is one area where custom versions can be modified to display pictures or designs exactly as you require.